Choosing the right water heating system can be a daunting task for homeowners, especially in Minneapolis where the cold winters demand reliable hot water. Whether you are replacing an old unit or installing a new one, understanding the nuances of water heater installation is crucial to ensure efficiency and longevity. This guide will walk you through the process, including key considerations, common challenges, and helpful tips that will make your installation experience smooth.
Understanding Different Types of Water Heaters
Before diving into installation specifics, it’s essential to familiarize yourself with the various types of water heaters available. Each type has its pros and cons depending on your household needs, budget, and space constraints.
Conventional Storage Tanks: These are the most common type found in many homes. They store hot water in a tank and are available in various capacities. Typically fueled by natural gas or electricity, these heaters can supply a significant amount of hot water at once. However, they have higher energy losses due to standby heat loss.
Tankless Water Heaters: Also known as on-demand heaters, these units heat water directly without storing it in a tank. They are energy efficient as they only operate when needed. Although they require a higher initial investment and may struggle to provide hot water for multiple simultaneous uses, they save space and energy over time.
Heat Pump Water Heaters: These systems use electricity to move heat from one place to another instead of generating heat directly. They can be highly efficient but require ample space and specific conditions to operate effectively.
Understanding these options will help you select the unit that best fits your needs while considering factors like cost-efficiency and installation complexity.
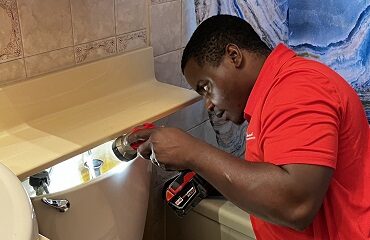
The Installation Process
Installing a water heater involves several critical steps that require attention to detail. Here’s a general overview of what you can expect during the installation process:
1. Assess Your Needs
Determine the size and type of water heater that suits your household's demands. Consider factors such as family size, peak usage times, and whether you prefer traditional storage tanks or tankless options.
2. Gather Necessary Tools and Materials
Proper preparation is key to a successful installation. Common tools needed include pipe wrenches, screwdrivers, pliers, a level, and Teflon tape. Additionally, you will need fittings for plumbing connections along with electrical supplies if you are installing an electric unit.
3. Prepare the Installation Site
Ensure that the area where your new water heater will be installed is clean and free from obstructions. Check local building codes regarding placement—especially concerning ventilation for gas units—and make any necessary adjustments beforehand.
4. Remove the Old Unit (if applicable)
If you're replacing an existing heater, turn off power or gas supply before disconnecting it from both plumbing and electrical lines. Dispose of it according to local regulations; some companies offer removal services as part of their installation package.
5. Install New Unit
Follow manufacturer instructions carefully during installation:
- For Conventional Tanks: Set up the tank level on its base before connecting inlet/outlet pipes. For Tankless Units: Ensure proper venting if gas-powered; install them vertically or horizontally based on specifications.
In both cases, check that safety features such as pressure relief valves are installed correctly.
6. Connect Plumbing and Electrical Lines
Connect cold water supply lines to your heater following guidelines for secure fittings. If using an electric model, hard-wiring might be necessary; consult an electrician if uncertain about local codes or safety measures.
7. Fill & Test
Once all connections are secure, turn on the cold shut-off valve and allow the tank to fill with water before powering up your unit—this prevents damage from dry firing elements in electric models.
After filling up completely, turn on power or gas supply gradually while monitoring performance for leaks or unusual noises during operation.
Common Challenges During Installation
While many homeowners decide to tackle their own installations for cost savings, there can be hurdles along the way:
- Space Limitations: In older homes particularly common in Minneapolis neighborhoods like Northeast or South Minneapolis where basements may be low ceilinged or cramped. Local Regulations: Compliance with city laws governing gas lines or electrical installations can complicate matters if unfamiliar with current codes. Existing Infrastructure Issues: Old piping may not accommodate newer systems efficiently leading to potential retrofitting costs.
Being aware of these challenges beforehand allows you better prepare solutions should they arise during your project.
When to Call Professionals
While many homeowners successfully install their own water heaters as DIY projects, there comes a time when professional assistance is warranted:
- If you encounter complex plumbing configurations that require specialized knowledge. When dealing with electrical connections beyond basic wiring. If local regulations necessitate permits which could result in fines if improperly handled.
Professional services not only ensure compliance but also provide peace of mind knowing experienced technicians professional water heating services handle installations safely while adhering strictly to code requirements.
Maintenance Tips for Longevity
Once installed properly by yourself or professionals alike—it is crucial to maintain your system regularly so it operates efficiently over time:
Flushing Regularly: Sediment buildup within storage tanks reduces efficiency significantly—flushing annually helps prevent this issue from escalating into costly repairs down the line.
Anode Rod Replacement: Inspecting this component every couple of years aids in preventing corrosion within tanks prolonging overall life expectancy considerably.
Temperature Settings Adjustment: Lowering temperature settings (to around 120°F) not only saves energy costs but also minimizes risks associated with scalding accidents—particularly important if children reside at home!
These simple tasks go far towards extending service life ensuring comfort year-round without unnecessary interruptions—especially when winter sets in!
Final Thoughts on Water Heater Installation
A new water heater represents more than just an appliance; it ensures comfort during harsh Minnesota winters while contributing significantly toward energy savings long-term if chosen wisely based on personal needs! By knowing where pitfalls might lie throughout installation processes—from selecting appropriate types suited best for specific homes all way through maintenance practices thereafter—you’re setting yourself up successfully indeed!
Navigating waters surrounding hot-water systems doesn’t have to feel overwhelming either—equipped with knowledge gained here today gives residents confidence moving forward confidently embarking upon their very own home improvement journey!